Table of Content
You can also use your pen or pencil to carve indentations in your shapes. Look at the white negative space that is created when it is repeated. These negative spaces can be really interesting when working with small patterns and can be filled with smaller shapes such as dots or stars. Lift up your lino, holding the edge of your fabric so it doesn’t stick. Now you have your first print, you can use this as a guide for printing a whole piece of fabric with your repeat pattern. This blog post goes over different ink types in depth.
The carving tool in this set has a smooth wooden handle, making it comfortable to carve with. Ideally, if you want to print on paper you should be using oil-based block printing inks with linoleum blocks. In my experience this leaves the most beautiful finish with the least amount of issues. Block printing is a fun and creative form of printmaking and can be used to produce beautiful patterns on paper or fabric. Traditionally block prints were made using wooden blocks, but these days the term is often used interchangeably to refer to lino printing as well. Draw the design you want to create on a piece of paper.
what kinds of block printing projects can you make?
You can block print plain rolls of Kraft paper and use it for gift wrapping, or print envelopes and cards for the holidays. There are endless projects you can do with block printing. They’ll think you’re a complete pro and you might even believe them…check out the 7 reasons you should start block printing here. Have you tried the techniques in our block printing basics workshop? Tag us on Instagram at @think.make.share or share on our Facebook page. For the second half of the block printing basics workshop, the artists could do whatever they wanted.

This magic stuff is what makes regular acrylic paint washable. I used Jo Sonja’s Textile Medium ($20 from Spotlight) because it was the first one I came across. This stuff isn’t super cheap though you only need a really small amount . I’m totally cheating and using a ready-made plain cushion cover I found on sale ($6 from Spotlight – Ikea has some great ones too!).
Featured Articles
Linoleum sheets can be found in all different sizes, specifically designed to be carved for printing. In most cases – a thin sheet of linoleum is adhered to a wood composite block. The desired design is then carved into the linoleum layer of the block. Sketch your idea on paper to ensure that you have something you’ll want permanently stamped onto your project. Once you’ve created a design you love, draw it onto your block and start carving. At its core – block printing is a very simple concept.
Some inks simply need to dry for a set amount of time before they are permanently set. Others require the application of heat – such as with an iron. After the tracing process, your block is going to look pretty awful, but don’t panic. You’ll fix that now and the rest when you start carving. This article was co-authored by wikiHow staff writer, Hannah Madden.
Trending Articles
Using the paintbrush, apply the paint to the sponge. You want a substantial amount of paint to soak in here – so several coats of paint may be necessary. Make sure that the area you are applying paint to on the sponge is large enough to accommodate the entire design on the block. Roll out your ink onto a tray using a brayer, then roll the brayer in one direction a few times to pick up the ink evenly. At this point, you’re ready to carve your block stamp. Draw your design inside the bounds of your rectangle.

They have become much more prolific of late though and can now be found in loads of places for really great prices. Initially, I went on a mad online search, eventually narrowing down eBay as a good source. At the time I saved a heap of wood blocks to my ‘Watch List’ though never actually bought any. It took stumbling across some at a local homewares store recently to finally prompt me. Sometimes there’s just something about buying stuff in person. I tried similar with carved potatoe stamps and butcher paper with kids to make wrapping paper.
It took me a bit to get in a routine and figure out how to add just the right amount of paint to the block. It’s quite possible that a foam roller would have been best to roll the paint on the block but I didn’t have one. After loading the paint onto the wooden block I laid my square drop cloth napkin onto a trash bag and placed the block on the bottom edge to begin my first row. You should be careful not to leave your printed fabrics in direct sunlight. Like any other fabric, they will fade and discolor much faster. Don’t put too much pressure on yourself to come up with a design that is super complex and detailed for your first attempt.

When people talk about block printing they are discussing a technique that is still done completely by hand. And though we live in a much faster-paced world in many ways – block printing is still a slow and meditative process. Carry on rotating your block until you’ve filled your page. Don’t worry if the ink catches on the ridges of the block and transfers to the paper – that’s just part of the charm of block printing!
A fun and super easy way to test block printing for first-timers – or kids – is to use potato halves. You can’t get an extreme amount of detail, but you can still create beautiful and unique printed fabrics at home. Potatoes are easy to carve – simple shapes work best – and can be printed just like the instructions described above! Of course, these stamps won’t last forever – so you’ll have to carve new ones with each project. This handy kit includes lots of materials and tools to help you produce fantastic block prints.
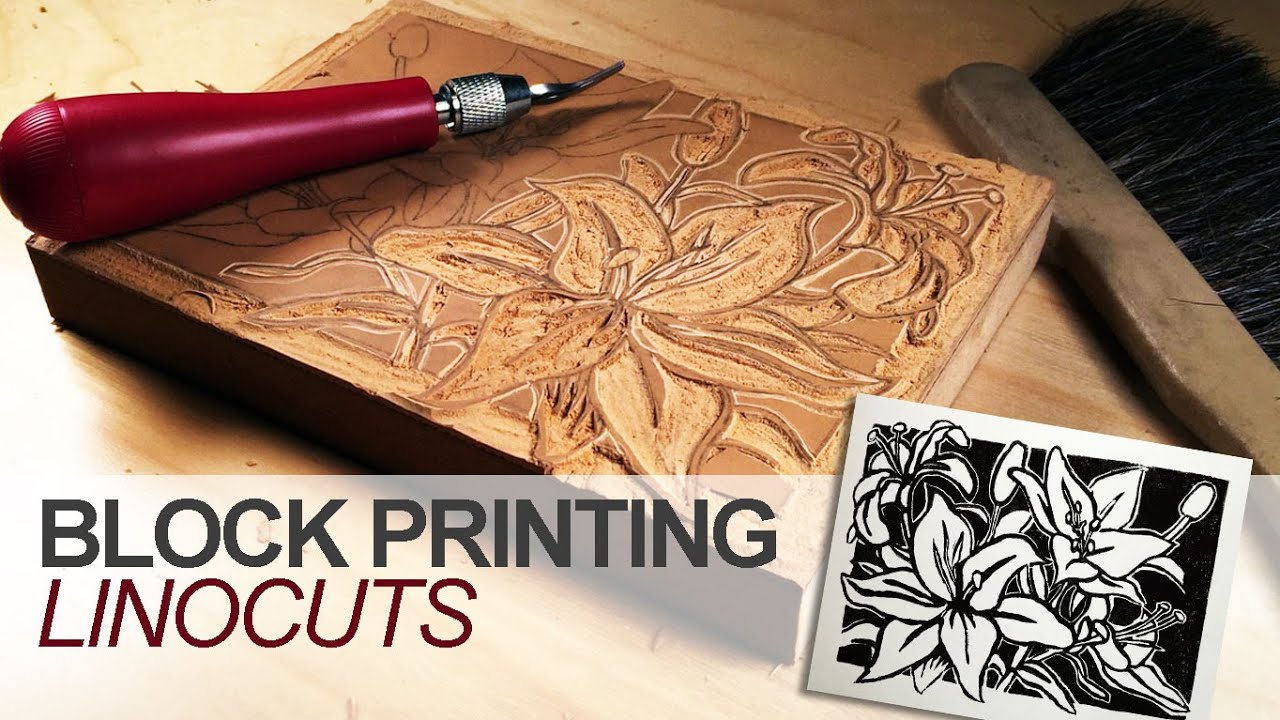
Fabric designer and block printing enthusiast Molly Mahon fell in love with the process when visiting India. As well as her own fabric and wallpaper collections she now runs workshops and tutorials on how to block print at home and has shared a simple step by step guide to follow. This block printing kit is ideal for complete beginners or people who have a little previous printing experience. This set contains a roller, lino cutters, ink, lino, printing paper and water-based ink. It also comes with a helpful instruction sheet explaining basic printmaking techniques for you to try. It’s well-presented and would make a wonderful gift.
Block printing is the overall term for creating prints using some variation on a stamp. You can use a wide variety of materials for making your stamps, the ink or paint you’ll use, or what you choose to print on. Making stamps with foam is a bit easier than making them out of rubber, because we can directly cut out designs instead of trying to carve them out of rubber. These stamps are a nice intro to block printing and are a fun way to personalize cards, gift tags or create some fun art pieces.
Finally – a few things you will want for your work area. When printing, you will want a somewhat supple – yet sturdy – surface under your fabric. A piece of cardboard or a double layer of felt will work well to absorb the pressure and allow the stamp to press fully into the fabric. Pins are also handy to have around so that you can keep the fabric in place while printing – especially important if you will be doing lots of prints.
Essdee lino printing kit
If you want the patterns to match up, it’s a good idea to make marks on the edge of the block so you know where the prints are going to line up. Or you can just experiment and enjoy the random patterns you can create! V-shaped tools are usually used for carving fine, straight lines, which U-shaped tools are better for carving curves and circles. To carve using the tools, hold them in your hand at a low angle can press them into the lino to carve it away. If you lift your hand too high, the tool may dig too deeply into the lino – it takes a little practice to learn this technique. You may find it easier to carve the lino if you guide the end of the tool using the finger of your opposite hand.

This isn’t entirely necessary though it does provide a nice clean starting point. Pre-washing your fabric ensures any factory coatings or chemicals are removed and also allows for any shrinkage. Ironing just makes your fabric neat, smooth and ready for stamping. Draw out your design with a pen or pencil onto one piece of foam. It could be anything you want, but keeping your design fairly simple will make it easier to cut out later on.


No comments:
Post a Comment